SpringCloud分布式架构给我们带来开发上的便利,同时增加了我们对事务管理的难度,微服务的遍地开花,本地事务已经无法满足分布式的要求,由此分布式事务问题诞生。 分布式事务被称为世界性的难题。
更多分布式事务介绍请看这篇文章:再有人问你分布式事务,把这篇扔给他
本文记录整合TX-LCN分布式事务框架管理分布式事务,用的版本是5.0.2.RELEASE
TX-LCN
简单介绍
TX-LCN分布式事务框架,LCN并不生产事务,LCN只是本地事务的协调工,LCN是一个高性能的分布式事务框架,兼容dubbo、springcloud框架,支持RPC框架拓展,支持各种ORM框架、NoSQL、负载均衡、事务补偿
特性一览
1、一致性,通过TxManager协调控制与事务补偿机制确保数据一致性
2、易用性,仅需要在业务方法上添加@TxTransaction注解即可
3、高可用,项目模块不仅可高可用部署,事务协调器也可集群化部署
4、扩展性,支持各种RPC框架扩展,支持通讯协议与事务模式扩展
更多介绍跟文档说明请看官网:https://www.txlcn.org/zh-cn/index.html
撸代码
我们按照官方文档(https://www.txlcn.org/zh-cn/docs/preface.html)一步步操作:
Tx-Manager
创建数据库、表
-
创建MySQL数据库, 名称为:tx-manager(我们直接选择在我们自己的数据库下面创建表就行了,这里就不创建这个数据库)
-
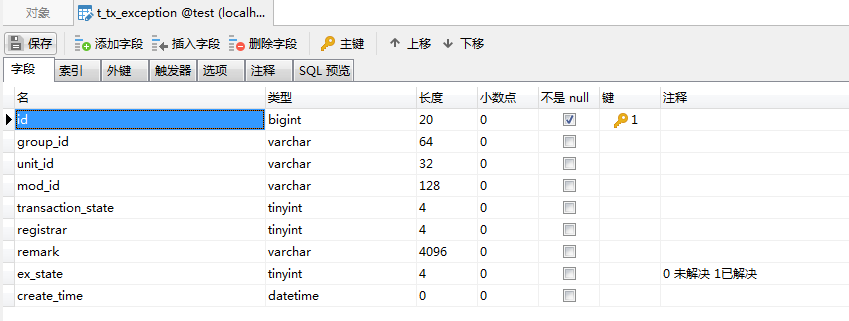
创建数据表:t_tx_exception

CREATE TABLE `t_tx_exception`  (`id` bigint(20) NOT NULL AUTO_INCREMENT,`group_id` varchar(64) CHARACTER SET utf8mb4 COLLATE utf8mb4_general_ci NULL DEFAULT NULL,`unit_id` varchar(32) CHARACTER SET utf8mb4 COLLATE utf8mb4_general_ci NULL DEFAULT NULL,`mod_id` varchar(128) CHARACTER SET utf8mb4 COLLATE utf8mb4_general_ci NULL DEFAULT NULL,`transaction_state` tinyint(4) NULL DEFAULT NULL,`registrar` tinyint(4) NULL DEFAULT NULL,`remark` varchar(4096) NULL DEFAULT  NULL,`ex_state` tinyint(4) NULL DEFAULT NULL COMMENT '0 未解决 1已解决',`create_time` datetime NULL DEFAULT NULL,PRIMARY KEY (`id`) USING BTREE
) ENGINE = InnoDB AUTO_INCREMENT = 1 CHARACTER SET = utf8mb4 COLLATE = utf8mb4_general_ci ROW_FORMAT = Dynamic;
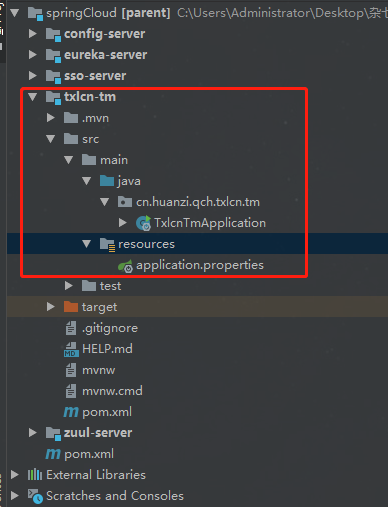
下载官网提供的最新版的TM项目,修改配置文件(PS:由于官网的下载地址打不开,我们去GitHub上面下载例子:https://github.com/codingapi/txlcn-demo),参考txlcn-demo-tm工程,在我们之前的项目下面创建一个springboot项目叫txlcn-tm
创建好springboot项目后,参照例子修改pom.xml文件
4.0.0 cn.huanzi.qch.txlcn txlcn-tm 0.0.1-SNAPSHOT txlcn-tm Tx-Manager(TM),TX-LCN分布式事务框架的独立服务 cn.huanzi.qch parent 1.0.0 com.codingapi.txlcn txlcn-tm 5.0.2.RELEASE org.springframework.boot spring-boot-starter-test test org.springframework.boot spring-boot-maven-plugin txlcn-tm
参照官网修改配置文件,详细的TM配置请戳:https://www.txlcn.org/zh-cn/docs/setting/manager.html,开发阶段最好开启日志,并设置为debug等级,这样方便追踪排查问题
spring.application.name=txlcn-tm
server.port=7970spring.datasource.driver-class-name=com.mysql.jdbc.Driver
spring.datasource.url=jdbc:mysql://localhost:3306/test?characterEncoding=UTF-8&serverTimezone=Asia/Shanghai
spring.datasource.username=root
spring.datasource.password=123456
spring.jpa.database-platform=org.hibernate.dialect.MySQL5InnoDBDialect
spring.jpa.hibernate.ddl-auto=validate# TM后台登陆密码
tx-lcn.manager.admin-key=123456tx-lcn.manager.host=127.0.0.1
tx-lcn.manager.port=8070# 开启日志,默认为false
tx-lcn.logger.enabled=true
tx-lcn.logger.driver-class-name=${spring.datasource.driver-class-name}
tx-lcn.logger.jdbc-url=${spring.datasource.url}
tx-lcn.logger.username=${spring.datasource.username}
tx-lcn.logger.password=${spring.datasource.password}
logging.level.com.codingapi.txlcn=DEBUG#redis 主机
spring.redis.host=127.0.0.1
#redis 端口
spring.redis.port=6379
#redis 密码
spring.redis.password=
在启动类添加注解 @EnableTransactionManagerServer
package cn.huanzi.qch.txlcn.tm;import com.codingapi.txlcn.tm.config.EnableTransactionManagerServer;
import org.springframework.boot.SpringApplication;
import org.springframework.boot.autoconfigure.SpringBootApplication;@SpringBootApplication
@EnableTransactionManagerServer
public class TxlcnTmApplication {public static void main(String[] args) {SpringApplication.run(TxlcnTmApplication.class, args);}}
把我们的Redis服务运行起来,然后启动txlcn-tm,启动成功后访问tm后台管理系统,使用默认密码登录(可以配置登录密码),访问 http://127.0.0.1:7970/admin/index.html进入管理后台,默认密码是codingapi,我们这里配置了123456
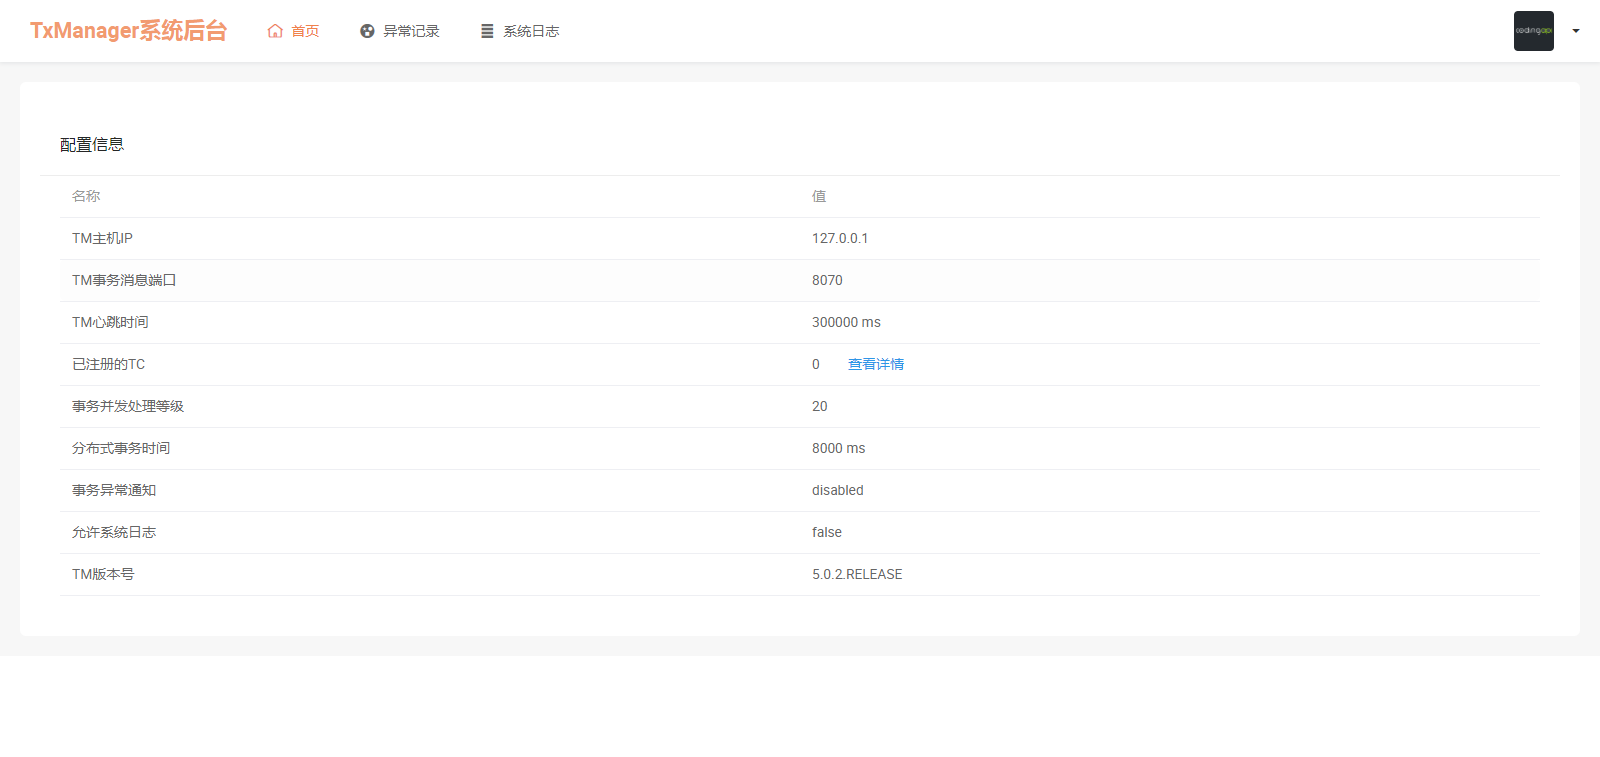
启动TM之前记得先启动我们的Redis服务,到这里,我们的tm搭建成功,更多TM介绍,请看官网TM管理手册:https://www.txlcn.org/zh-cn/docs/manageradmin.html
Tx-Client
TC端参照官网一步步操作:https://www.txlcn.org/zh-cn/docs/start.html
1、TC引入依赖
com.codingapi.txlcn txlcn-tc 5.0.2.RELEASE com.codingapi.txlcn txlcn-txmsg-netty 5.0.2.RELEASE
PS:如果你没有添加jdbc驱动,启动的时候会报错
Parameter 0 of constructor in com.codingapi.txlcn.tc.core.transaction.txc.analy.TableStructAnalyser required a bean of type 'javax.sql.DataSource' that could not be found.因此要添加jdbc依赖
org.springframework.boot spring-boot-starter-jdbc 2、配置文件添加TM地址跟监听端口,如果TM是默认8070端口,且跟TC部署在同一台机器,可以忽略这个配置,并且开启日志,开发阶段最好开启日志,并设置为debug等级,这样方便追踪排查问题
# 是否启动LCN负载均衡策略(优化选项,开启与否,功能不受影响)
tx-lcn.ribbon.loadbalancer.dtx.enabled=true
# 默认之配置为TM的本机默认端口
tx-lcn.client.manager-address=127.0.0.1:8070
# 开启日志,默认为false
tx-lcn.logger.enabled=true
tx-lcn.logger.driver-class-name=${spring.datasource.driver-class-name}
tx-lcn.logger.jdbc-url=${spring.datasource.url}
tx-lcn.logger.username=${spring.datasource.username}
tx-lcn.logger.password=${spring.datasource.password}
logging.level.com.codingapi.txlcn=DEBUG
3、在启动类上使用 @EnableDistributedTransaction
//省略其他代码...
@EnableDistributedTransaction
public class MyspringbootApplication {public static void main(String[] args) {SpringApplication.run(MyspringbootApplication.class, args);}
}
4、在提交本地事务的地方添加@LcnTransaction,分布式事务注解,PS:@LcnTransaction的target是在方法上的,@Target({ElementType.METHOD})
测试代码
我们挑选之前的两个项目myspringboot、springdatejpa,按照步骤设置成TC,
并且在两个TC添加测试接口,
myspringboot
controller
/*** 测试分布式事务*/@GetMapping("feign/save")Result save(UserVo userVo){//模拟数据Description description = new Description();description.setUserId("111");description.setDescription("测试用户描述");Result save = descriptionService.save(description);System.out.println(save);return null;}
service
@Override@LcnTransaction//分布式事务@Transactional //本地事务public Result save(Description description) {UserVo userVo = new UserVo();userVo.setUsername("huanzi");userVo.setPassword("123");//调用springdatejpa服务保存userVoResult result = myspringbootFeign.save(userVo);System.out.println(result);//myspringboot本地服务保存descriptionDescription save = descriptionRepository.save(description);System.out.println(save);//模拟发生异常throw new RuntimeException("business code error");}
feign
@FeignClient(name = "springdatejpa", path = "/user/",fallback = MyspringbootFeignFallback.class,fallbackFactory = MyspringbootFeignFallbackFactory.class)
public interface MyspringbootFeign {@RequestMapping(value = "save")Result save(@RequestBody UserVo userVo);
}
springdatejpa
这个原先就已经有对应的save接口,其他的代码我们就不贴了,在UserServiceImpl类重写save方法,在save方法上添加@LcnTransaction注解
@LcnTransaction//分布式事务@Transactional //本地事务@Overridepublic Result save(UserVo entity) {User user = userRepository.save(FastCopy.copy(entity, User.class));return Result.of(FastCopy.copy(user, UserVo.class));}
演示效果
启动所有项目,TM跟Redis服务也要记得启动
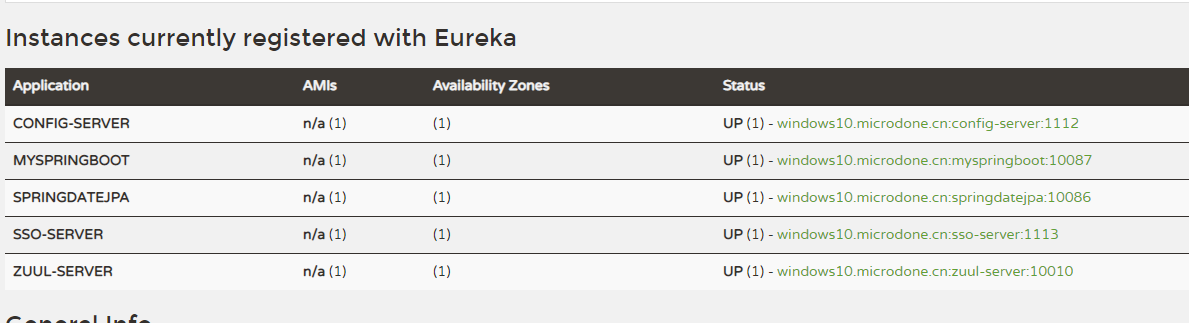
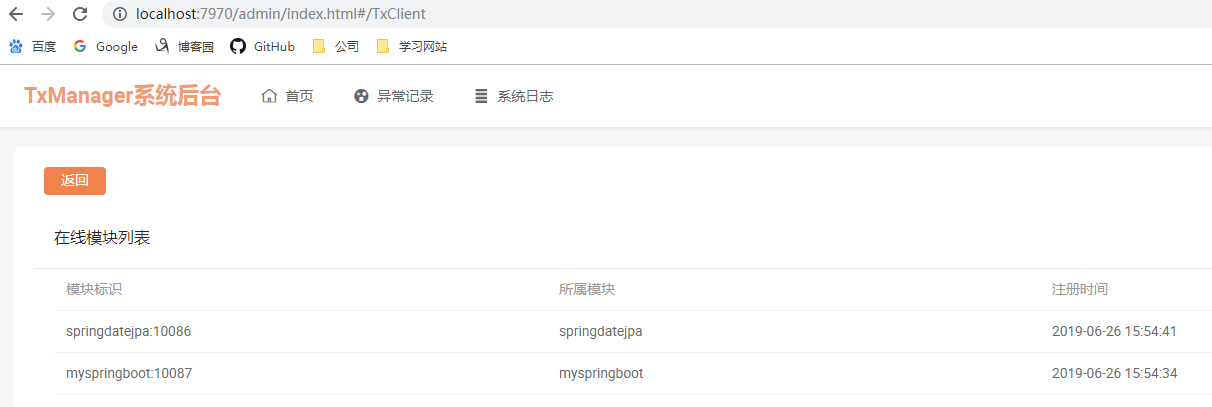
查看TM后台,可以看到成功注册了两个TC
访问http://localhost:10010/myspringboot/feign/save,被单点登录拦截,登录后跳转正常跳转该接口,这些就不再演示了,下面直接看后台debug日志
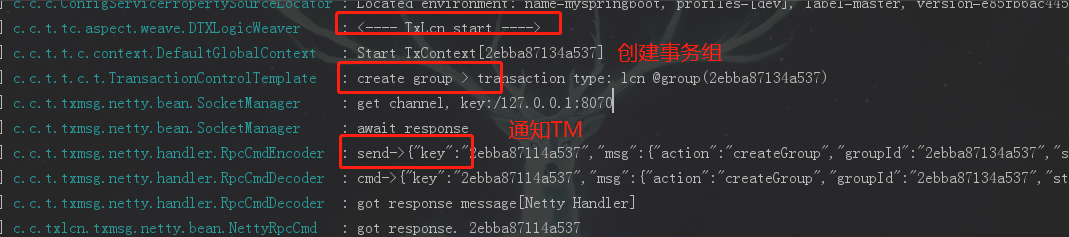
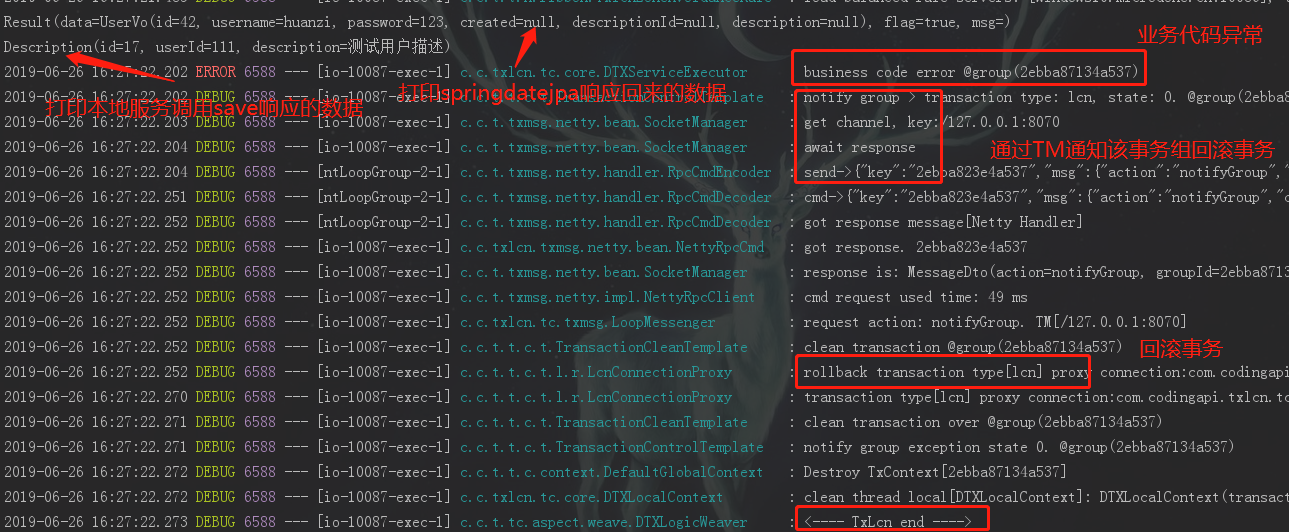
调用流程
myspringboot(A) ---> springdatejpa(B)
事务回滚
myspringboot(A)
springdatejpa(B)
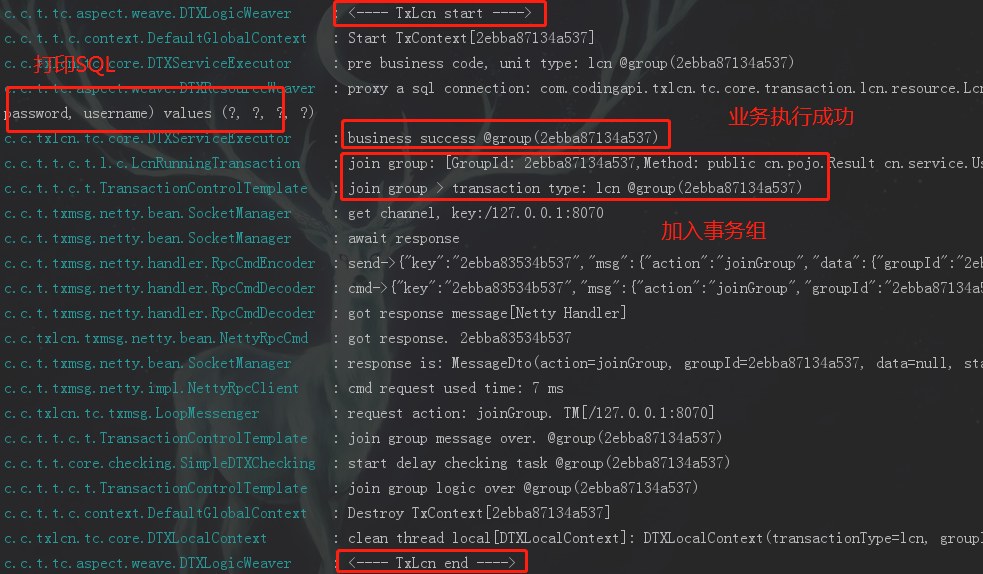
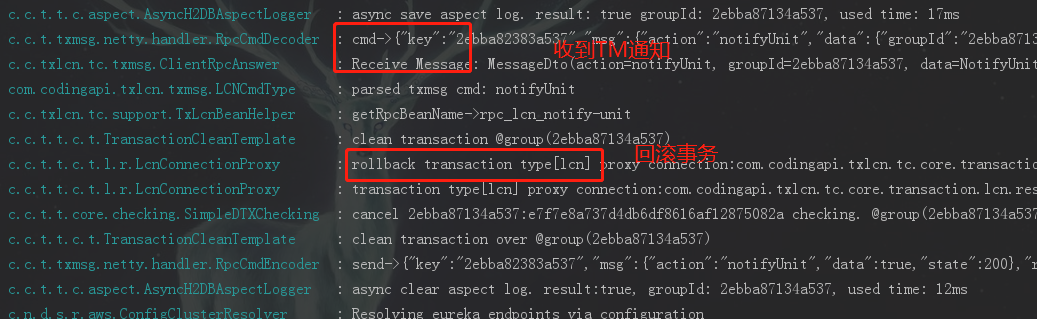
到这里springdatejpa(B)已经响应了user数据给myspringboot(A),而后收到回滚通知
事务提交
我们看一下事务正常提交是怎么样的,我们把模拟异常注释起来,并返回保存后的数据
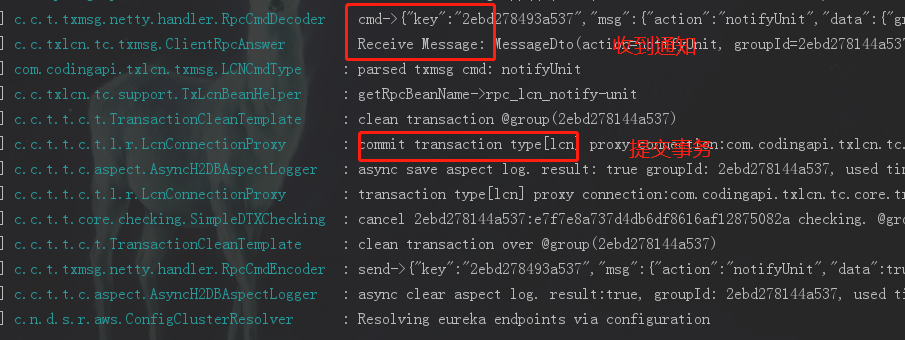
//模拟发生异常//throw new RuntimeException("business code error");return Result.of(save);我们直接从springdatejpa(B)响应数据之后看
myspringboot(A)
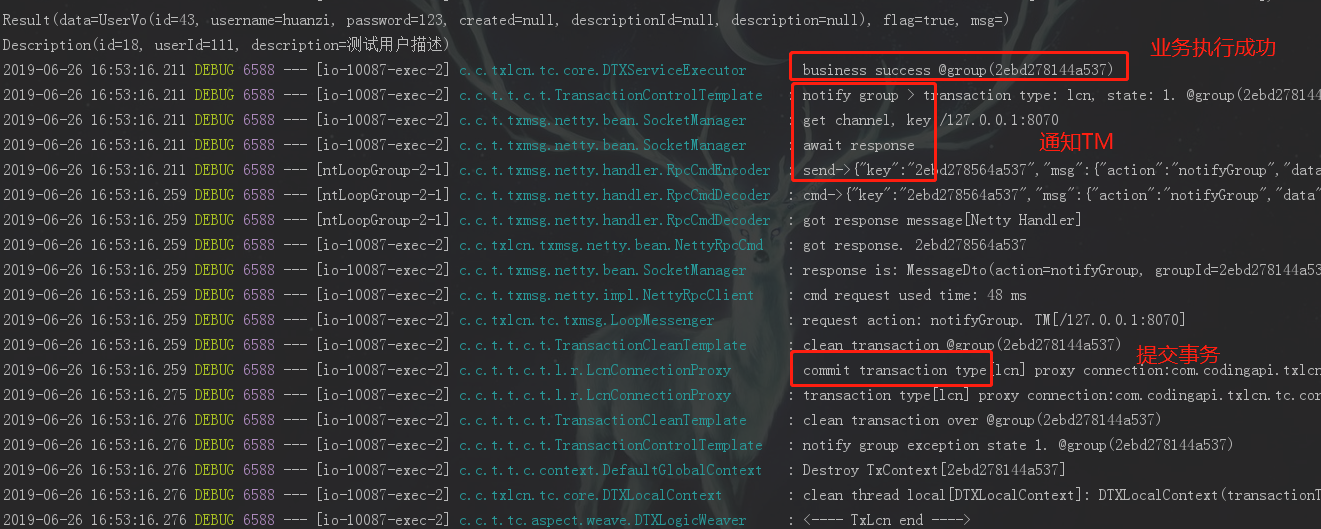
springdatejpa(B)
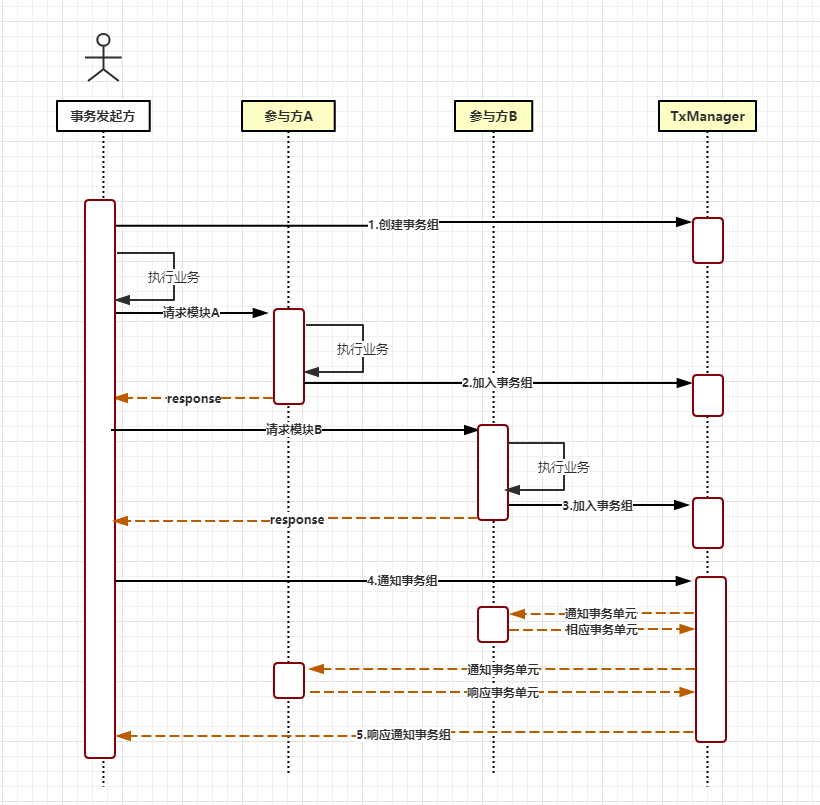
具体的流程已经事务控制原理可以查看官网:https://www.txlcn.org/zh-cn/docs/principle/control.html,这里简单的贴出官网提供的原理图: